I finally bought a mandolin.  And what was the first thing I did upon return home?  Make two varieties of chips, of course!

Apple chips were a sinch to make.  Slice the apple, sprinkle sugar + cinnamon + nutmeg mix on them, pop them in the dehydrator until they look done (several hours).  Verdict: not as good as I thought.  They were still a bit chewy.. I prefer a raw apple.

Potato chips were a bit more involved and didn’t come out as perfect.  I decided to go with salt and vinegar chips.  I cut the potatoes and then soaked the slices in vinegar (I actually put them in a skillet and simmered them for 5 minutes, then let them soak for a while.  After draining the liquid, I tossed them in oil, salt and pepper.  Spread them on a baking sheet and at 400 I cooked them about 20 minutes.  Verdit: the flavor was totally there, but the baking wasn’t.  Most of them cooked too much while the center ones didn’t cook enough.

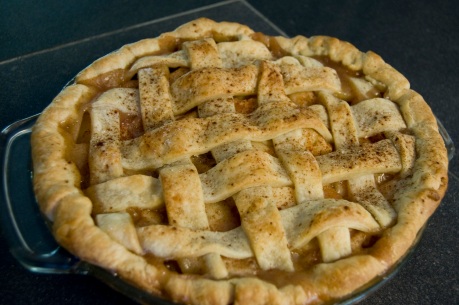
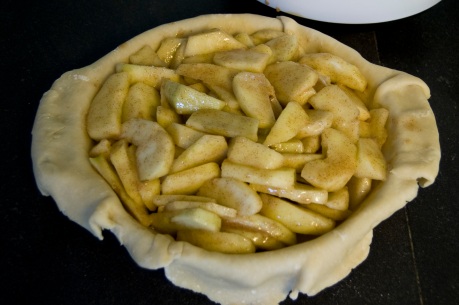
I have accomplished something I’ve been dreaming of forever: I made my very first homemade apple pie. I went straight to Martha, assuming she’d have a classic apple pie recipe. I followed her recipe and searched the web for instructions on how to make a lattice top.  I must say, I certainly did well on presentation.  EDIT: I just ate my first slice.  TO DIE FOR.  Everything is perfect.  Martha for the win!

Ingredients

1/4 cup all-purpose flour (spooned and leveled), plus more for rolling dough
1 recipe (2 disks) Basic Pie Dough
2 tablespoons freshly squeezed lemon juice (from 1 lemon)
4 pounds (8 to 10) apples, such as Empire, Granny Smith, Gala, Cortland, Winesap, or a mix – I used 5 large apples, and even that was too much
3/4 cup sugar
1 teaspoon ground cinnamon
1/2 teaspoon salt
2 tablespoons unsalted butter, cut into small pieces


Directions

  1. Lightly flour a large piece of waxed paper; place a disk of dough in center. Rolling from center outward, form into a 12-inch circle. (Use paper to rotate dough, and flour rolling pin and paper as necessary to prevent sticking.) Transfer dough (still on paper) to a baking sheet; cover and refrigerate. Repeat with second disk of dough.
  2. Preheat oven to 450 degrees with a rack set in lowest position. Remove first circle of dough from refrigerator; wrap around rolling pin (discarding paper), and carefully unroll over a 9-inch pie plate. Gently lift edges and lower dough into the pie plate so it hugs bottom and sides. Avoid stretching the dough, which will make it shrink during baking. Refrigerate.
  3. Place lemon juice in a large bowl. Peel, core, and cut apples into 1/4-inch-thick slices; halve crosswise, and add to lemon juice (to keep them from turning brown) as you work. Add sugar, flour, cinnamon, and salt; toss to combine.
  4. Remove dough-lined pie plate from refrigerator. Fill with apple mixture, gently packing apples and mounding slightly in center; dot with butter. Lightly brush rim of pie shell with water. Remove remaining circle of dough from refrigerator. Lay over apples; press along moistened rim to seal. Using kitchen shears, trim overhang to 1 inch.
  5. With floured fingers, fold overhang under itself to form a thick rim; pinch between thumb and forefinger to form a uniform edge around the rim of the pie plate.
  6. To crimp edges: With thumb and index finger of one hand, gently press dough against knuckle of other hand; continue around pie. (Deep indentations anchor dough on rim and prevent it from sliding down sides of pie plate during baking.)
  7. With a floured paring knife, cut 5 to 6 slits in top of pie, radiating from center; place pie plate on a rimmed baking sheet. Bake 20 minutes; reduce heat to 375 degrees and bake until crust is golden and juices are bubbling, 50 to 60 minutes more. If edges brown too quickly, cover with aluminum foil. Cool completely, at least 6 hours, before serving.  I cooked for 40 minutes because it was bubbling over.

From http://www.marthastewart.com/341735/apple-pie

For the dough, I followed her dough recipe– really easy to do.

Ingredients

2 1/2 cups all-purpose flour, (spooned and leveled)
1 teaspoon salt
1 teaspoon sugar
16 tablespoons cold (2 sticks) unsalted butter, cut into pieces
1/4 to 1/2 cup ice water

Directions

  1. In a food processor, combine flour, salt, and sugar; pulse to combine. Add butter; pulse until mixture resembles coarse meal, with just a few pea-size pieces of butter remaining.
  2. Sprinkle with 1/4 cup ice water. Pulse until dough is crumbly but holds together when squeezed with fingers (if necessary, add up to 1/4 cup more water, 1 tablespoon at a time). To help ensure a flaky crust, do not overprocess.
  3. Transfer half of dough (still crumbly) onto a piece of plastic wrap. Form dough into a disk 3/4 inch thick; wrap tightly in plastic. Refrigerate until firm, at least 1 hour (and up to 3 days). Repeat with remaining dough. (Disks can be frozen, tightly wrapped, up to 3 months. Thaw before using.) Makes 2 disks.

Now that it’s officially fall and the cooler weather has set in, my broccoli plants have never been happier.  As I’m normally not a big fan of [boring] steamed broccoli dishes, I’ve just been freezing all the harvest thus far to use in our favorite winter dish: stir fry.  However, I came across these two recipes that are making me rethink freezing.. maybe I’ll give ’em a try.

Slow Cooked Broccoli with Lemon Breadcrumbs
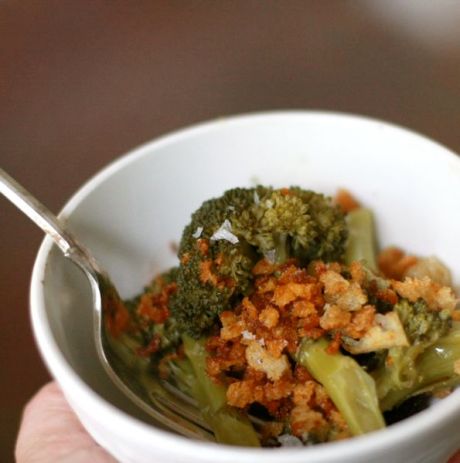
serves 4 to 6 as a side dish

1 1/2 pounds broccoli
3 to 4 cloves fresh garlic, peeled
1/3 cup olive oil
Salt
Red pepper flakes (optional)
1 tablespoon butter
1 tablespoon olive oil
1 1/2 cups fresh, roughly textured breadcrumbs (made from stale bread)
Flaky sea salt (such as Maldon)
1 lemon
Freshly ground black pepper

Break down your broccoli as follows: Cut the thick stems from the florets, peel and cut them into 1-inch chunks. Break the florets into pieces. If the garlic cloves are small (the size of an almond) leave them whole. Cut larger cloves into halves or quarters.

Pour the olive oil into a large pot (4 quarts or so) that has a tight-fitting lid. Add the broccoli, starting with the stems and followed by the florets, and garlic and a pinch of salt. Add about 2 or 3 tablespoons of water and put on the lid. Place over a medium low flame and cook until you can hear the liquids starting to simmer (about 10 minutes.) It’s OK to peek in the pot to see how things are going. Turn the flame down as low as possible and continue cooking until the broccoli is limp and completely soft, about another hour. Turn off the heat but keep the lid on.

In a large frying pan, heat up the oil and butter and add the breadcrumbs (and optional red pepper flakes) and sauté until the crumbs begin to brown. Add a small pinch of the salt and turn off the heat. Using a microplane or a fine grater, carefully grate just the peel from the lemon and toss in with the crumbs.

To serve: Remove the broccoli from the pan with a tongs until the only thing left in the pot are the cooking liquid and the garlic cloves (which will be quite soft.) Smash the cloves against the sides of the pot and mix them into the liquid and pour it over the broccoli. Sprinkle on the breadcrumbs, grind some fresh pepper over everything and serve.

Notes:
• This is also really good tossed with pasta and served as a main course. Just toss the pasta, the broccoli and juices together and sprinkle on the breadcrumbs. You may want to add some grated parmesan cheese as well.

• You can make this dish vegan by eliminating the butter in the breadcrumbs.

• Adding chopped almonds to the breadcrumbs is a nice touch, too.

From http://www.thekitchn.com/thekitchn/recipe-slowcooked-broccoli-with-crunchy-lemon-breadcrumbs-157654


Detox Salad
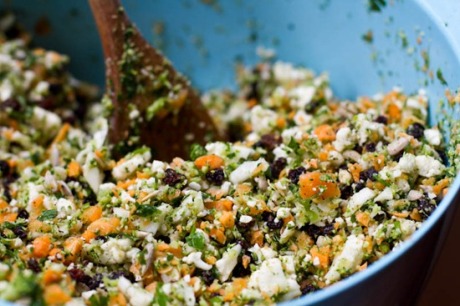
Yield: 10 cups (lots for the whole week!!)

Ingredients:

2 heads broccoli (1 bunch), stems removed
1 head cauliflower, stems removed
2.5 cups shredded carrots
1/2 cup sunflower seeds
1 cup currants
1/2 cup finely chopped fresh parsley
1/2 cup raisins
4-6 tbsp fresh lemon juice, to taste
kosher salt, pepper (I used 1/2 tsp salt and lots of pepper)
kelp granules or Herbamare (optional), to taste
Pure maple syrup, to drizzle on before serving

1. In a food processor (or chop by hand) process the broccoli (no stems) until fine. Add into large bowl.

2. Now process the cauliflower (no stems) until fine and add into bowl. Do the same with the carrots.

3. Stir in the sunflower seeds, currants, raisins, and parsley. Add lemon juice and seasonings to taste.

4. Drizzle with maple syrup to taste.

From http://ohsheglows.com/2011/09/27/detox-salad/

Our habanero plants are exploding right now, so rather than fill a third mason jar with dried peppers, Nick decided to venture into the world of homemade hot sauce.  He decided to combine the ingredients from his favorite local hot sauce, Clancy’s Fancy, with another fruity hot sauce recipe he found online.  He made 4 batches, each with different combinations of fruit and habaneros.

Core ingredients

2 cloves garlic
1 tsp grated ginger
black pepper
1 tsp cumin
1/2 tsp corriander
1/2 tsp all-spice
1 tsp paprika
2 tbs soy sauce
1 cup apple cider vinegar
1/2 cup brown sugar
1/2 cup molasses
2 cups fruit

Batch 1: 16 habaneros, peaches in syrup
Batch 2: 12 habaneros, peaches no syrup
Batch 3: 16 habaneros, frozen pineapple and mango
Batch 4: 12 habaneros, frozen pineapple and mango

He also baked the habaneros at 350° for one hour to lessen the kick.  All in all, lessons learned: less fruit, more soy sauce, less molasses.  Batch 4 was the least spicy, but still too much for me.  But this hot sauce has such a good taste, with less habaneros it could pass as a barbecue sauce.

While breakfast is one of my favorite meals, I often don’t have time/appetite to eat it at 6:30 AM before I head to work.  But making a little something the night before which can be eaten at work seems like the ideal situation.  Here are several good ideas:

Fruit on the Bottom Yogurt Cups

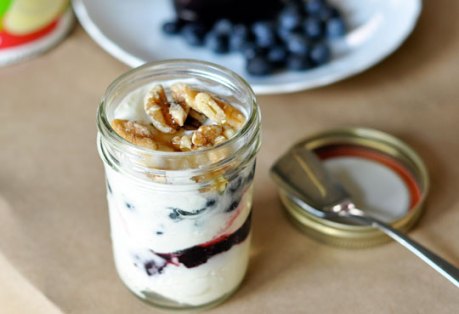
To make this particular yogurt cup I layered about 1/2 cup of plain, whole-milk yogurt with a spoonful of berry jam, a handful of blueberries, a drizzle of honey, and a few walnuts. It made for delicious eating — I dug the spoon down to the bottom and it came up with a bite of everything. Sweet jam, tangy blueberries, and tart yogurt.

From: http://www.thekitchn.com/thekitchn/brown-bag-meals/make-your-own-fruitonthebottom-yogurt-cups-125467

Oatmeal in Jars

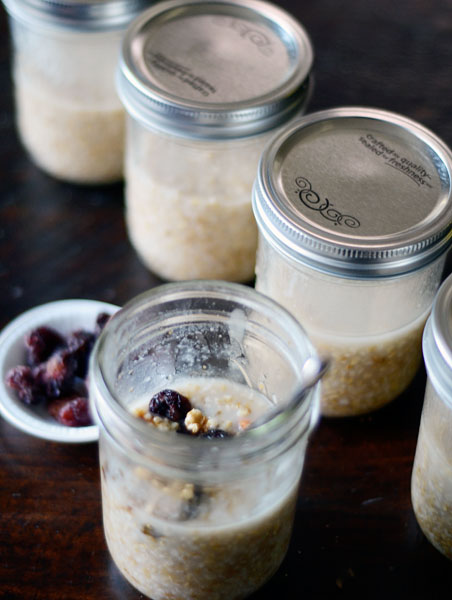
Basically you combine oats and water, bring them to a boil, then cover and turn off the heat. Leave overnight and in the morning simply warm them up. They’ll be perfectly cooked — tender, chewy, and creamy.

Here I offer an idea: Do this just once on Sunday night, and divide the oatmeal between five jars. You’re immediately set up for a week of breakfasts! The great thing about steel-cut oats (well, the millionth great thing, I guess) is that they get even better as they are reheated. They stay chewy and creamy, and a few days in the refrigerator only improves their taste and texture. This is a great project for Sunday afternoon or evening, perhaps while you’re making dinner. Just make the oats, put them in your jars, and you’re good to go!

From: http://www.thekitchn.com/thekitchn/tips-techniques/oatmeal-in-jars-a-week-of-steelcut-oats-in-5-minutes-143623


I love potatoes, so new twists on basic potato meals are always welcome.  I’m almost positive I’d love this one:

Lemon-Thyme Sliced Baked Potatoes

Adapted from Ideas in Food
Makes 4 servings

4 medium waxy potatoes
1 lemon, washed
12 sprigs of thyme
2 large garlic cloves
Olive oil
Salt

Preheat the oven to 400 degrees F. Thinly slice the lemon and garlic cloves. Cut each potato into ¼-inch slices, being careful to not cut all the way through, so the slices are held together. Rub each slice with a little olive oil and sprinkle with salt. Tuck the lemon, thyme and garlic into the potato slices.

Place the potatoes on a baking sheet, cover with foil and roast for 45 minutes, or until tender. Uncover and broil for a few minutes, until browned and crisp. Serve topped with a little butter and a sprinkling of fleur de sel, if desired.

From: http://www.thekitchn.com/thekitchn/side-dish/sliced-seasoned-baked-potatoes-155856

Now that we’ve dabbled in canning, next summer I expect to go all out.  And when that time comes, here are some good resources/inspiration for canning:

National Center for Home Food Preservation

Food in Jars blog

Punk Domestics community

Canning Across America community

Well Preserved blog

My mom is famous (in my book) for her desserts, and this one tops the list.  There’s nothing to it to make, and as long as you’ve got the fruit then all the other ingredients are in the cupboard.

Ingredients

5 cups sliced fruit (if using peaches, 5 firm peaches)
1/3 cup sugar
1 tbsp tapioca or flour

Topping
1/2 cup flour
1/2 cup oatmeal (traditional, not quick oats)
1/2 cup sugar
1/4 cup chopped walnuts
1/4 cup canola oil
1 tsp vanilla
1 tsp cinnamon

Bake 375° covered for 45 minutes (10 minutes uncovered)

Why we never thought about this before, I don’t know.  It’s a perfect lunch for our non-leftover food days.

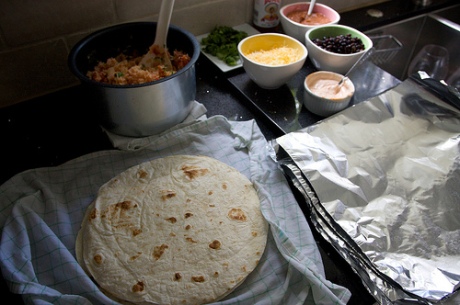
“This is how I do it: I make a batch of rice in my rice cooker.  I add a can of diced tomatoes, 1 chopped onion, a clove of  minced garlic & some chili powder and let it cook.  When it’s done, I add some cilantro to make it more colorful.  On this batch, I have a can of refried beans, black beans, grated cheese, fresh cut cilantro & a hot sauce/greek yogurt combo for my sour cream.  Don’t forget your hot sauce!  Tapatio is one of my faves!  I take a dish cloth and run it under the faucet to moisten it, making sure to squeeze out any extra liquid.  I then wrap up a stack of burrito sized flour tortillas in the towel and toss them in the microwave for 1 minute. It helps make the tortillas more pliable for wrapping.  In that minute, I make a stack of aluminum foil sheets so I can easily wrap burritos up right after I fold them.  I load each tortilla  with our favorite toppings (not TOO much) and wrap it up!  It takes a little practice at first, but in no time, you will be come an expert!”

So when you are ready to eat one, you just:

1. Unwrap frozen burrito from foil

2. Wrap burrito in damp paper towel

3. Microwave for 3 mins on high.

4. Wait to cool, then eat!

From: http://www.shutterbean.com/make-your-own-freezer-burritos/

I’ve been waiting all summer for this.  When we decided to build an enormous garden with a huge variety of different veges, all I cared about was being able to make spaghetti sauce and pesto from our harvest.  Last weekend we successfully froze an equivalent of 8 jars of pesto (in muffin tins!) and this weekend we went spaghetti sauce crazy.

We used my mom’s pressure cooker and these directions.  We diced and broiled about 60 tomatoes (skins on, and we tried to deseed as much as possible before dicing), and used carrots, celery, garlic, onions, a ton of fresh herbs (thyme, parsley, and basil — next time add oregano), some tomato paste (to make it more red), and a touch of balsamic vinegar and white wine.  We didn’t follow any recipe for proportions, and next time we probably should.  We just made it to taste (which is awesome), but issues arise when you lower the acidity (but we solved that by doubling the time in the pressure cooker).

We did follow the instructions carefully for using the pressure cooker.  Jars must be run through the dishwasher, lids and plastic utensils placed in recently boiled water, and no sauce on the rim when funneling it in the jar.

Five pint jars fit in the pressure cooker, which meant we added 1.5 quarts (6 cups) of water. We heated it up, waited for the weight to jiggle like crazy, and then cooked for 40 minutes (recommended is 20).  Viola!  Spaghetti sauce!